Thursday, August 27, 2020

Creating Scheduling Agreement

 What is SAP ERP and Enterprise Resource Planning Software? • Geoxis

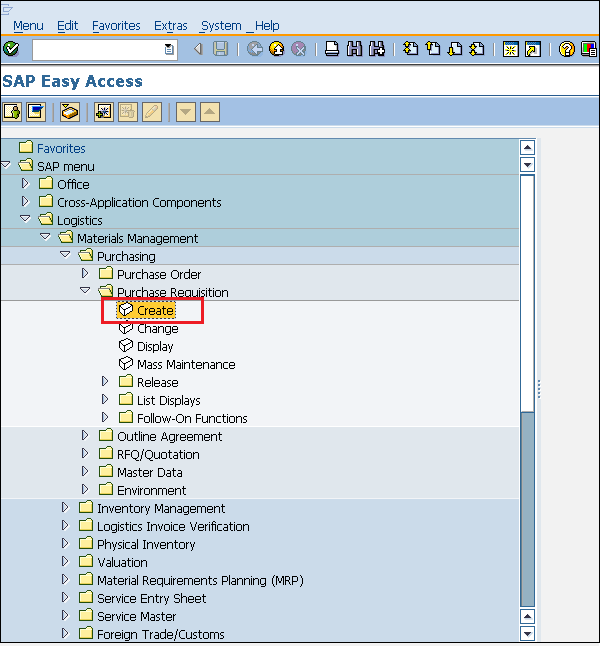
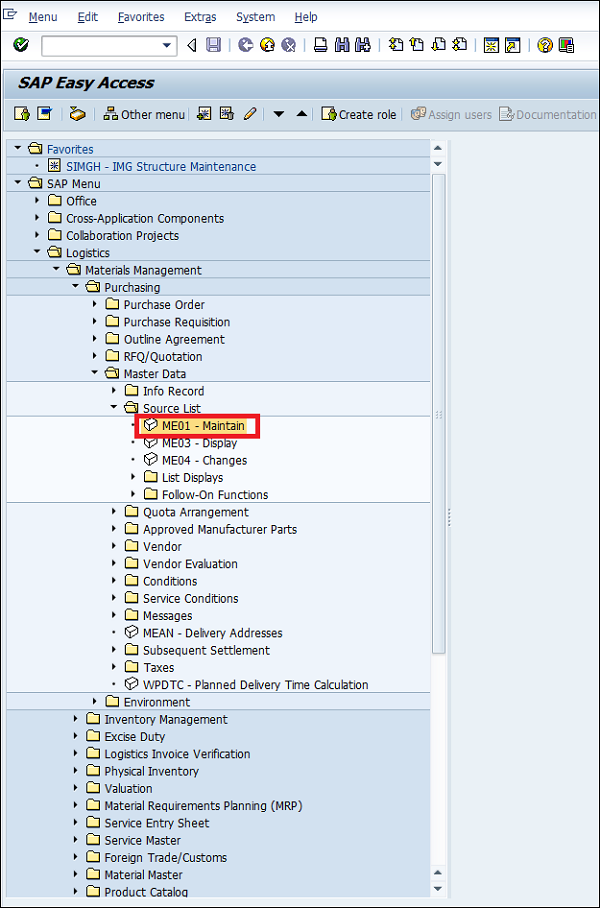
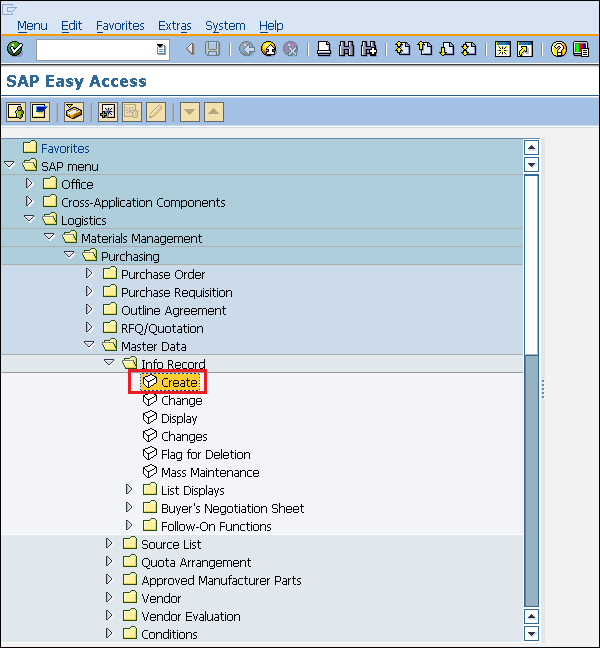
Path to Create Scheduling Agreement:-

Logistics ⇒ Materials Management ⇒ Purchasing ⇒ Outline Agreement ⇒ Scheduling Agreement ⇒ Create ⇒ Vendor Known

TCode: ME31L


A scheduling agreement can be created in the following two ways:-

  • 👉Creating scheduling agreement
  • 👉Maintain scheduling lines for the agreement

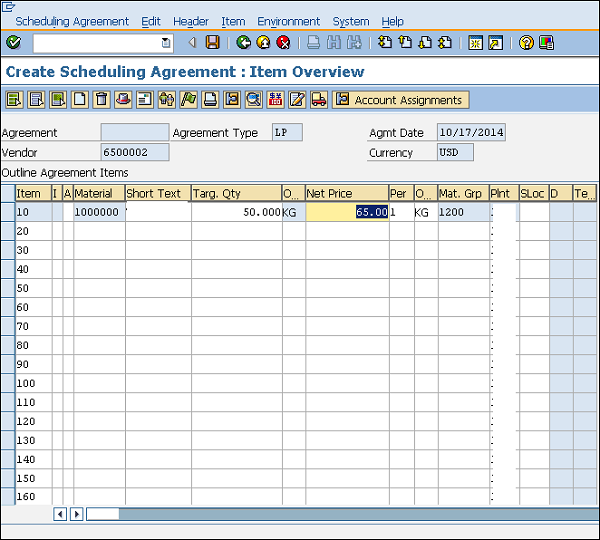
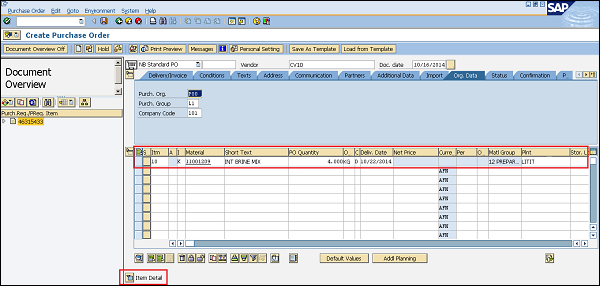
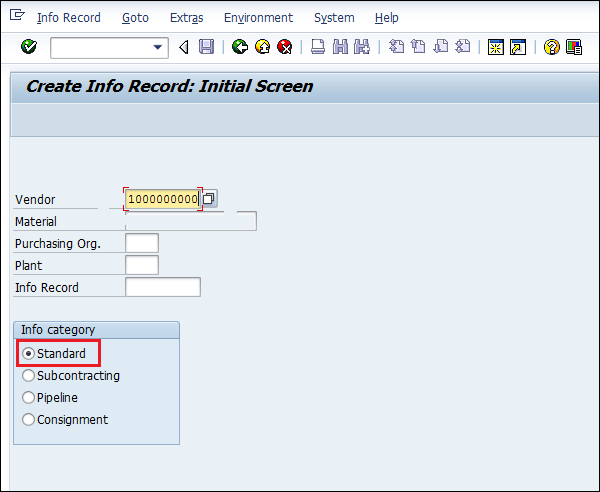
Step 1:-Create execute icon by following the above path.

SAP sa create detail

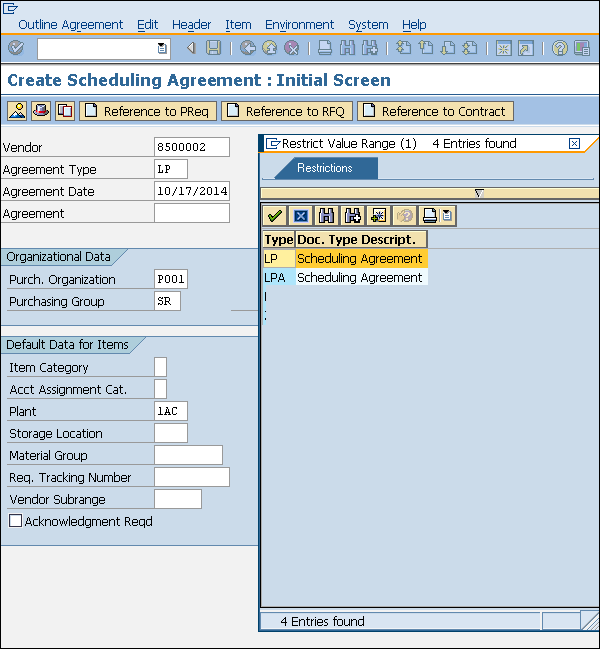
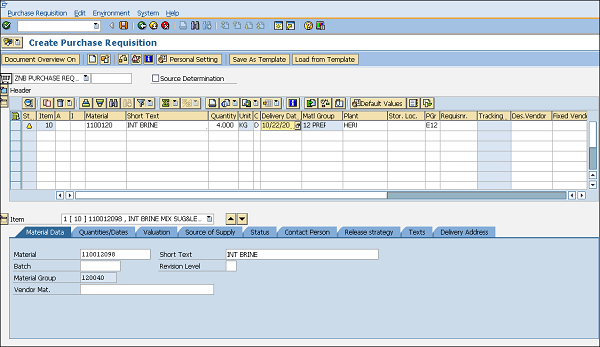
Step 2:- After filling the details name of the vendor, agreement type (LP for scheduling agreement), purchasing organization, purchasing group, plant along with agreement date.

SAP sa create detail

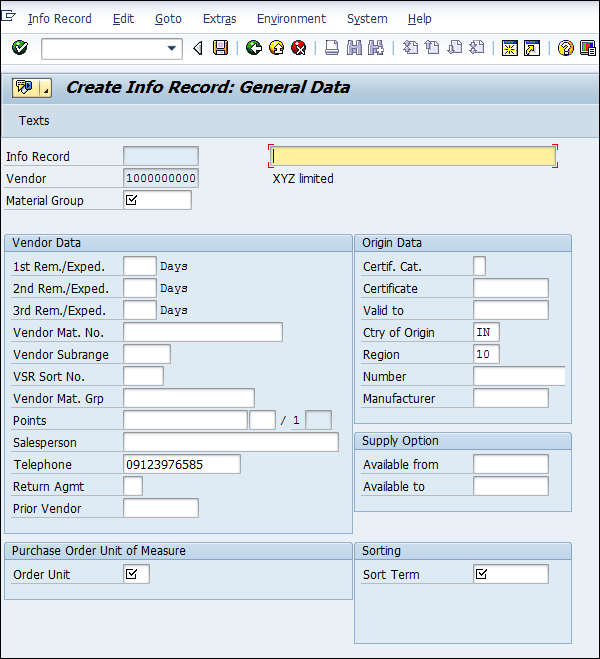
Step 3:- Provide material number along with the target quantity, net price, currency, and material group. Click on Save. A new Scheduling Agreement will be created.

SAP sa entry


Create Outline Agreement

Thinking of moving SAP Business One to the cloud? - Leverage SAP Business  One

Contract:- 

contract is a longer-term purchase agreement, known in the SAP System as an "outline agreement", against which materials or services can be released (ordered) as and when required over a predefined validity period. Contracts can be subdivided into the following types given below:-

 An outline agreement can be of the following two types −

      • Contract:-
      • Scheduling Agreement

There are two types of contracts −

 ðŸ‘‰Quantity Contract
 ðŸ‘‰Value Contract

Path to Create Contract

Logistics ⇒ Materials Management ⇒ Purchasing ⇒ Outline Agreement ⇒ Contract ⇒ Create

TCode: ME31K


Step 1:-select the Create execute icon by following the above path after entering the tcode ME31K.


Step 2:- After entering the details like vendor, agreement type, purchase organisation,purchase group,Plant or storage location etc.

SAP contract entry

Step 3:- After saving the document showing like this given below.


Tuesday, August 25, 2020

Creating Purchase Order from Purchase Requisition

Work on sap erp consultation in ecc and s4 hana by Psowmya 

Purchase Order from PR:-

TCode: ME21N

Step 1:-Purchase order home screen. Select Purchase Requisition as shown in the following screenshot.

SAP PO from PR

Step 2:- Enter the document number or vendor and choose the created document and adopt the document after copy.


Step 3:-Drag the standard reference Purchase Requisition to the cart it showing like this given below.

SAP PO from PR detail

Step 4:- Verify the details of the purchase order and do the necessary changes as per requirement. Click on Save.

SAP PO from PR detail

Create Purchase Requisition

Six Important Steps for Deploying SAP ERP High Availability - eWEEK 

Path to Create Purchase requisition:-

Path to Create Purchase requisition

Logistics ⇒ Materials Management ⇒ Purchasing ⇒ Purchasing Requisition ⇒ Create

TCode: ME51N

Step 1:-Select the Create execute icon by following the above path.


SAP Purchase requisition


Step 2:-Fill the details like material, quantity, delivery date, material group, and plant. Click on Save. A new Purchase Requisition will be created.


SAP Purchase requisition detail


Step 3:-After creating a purchase requisition, we need to send our requirements to the vendor. It is done through a document that is known as the purchase order.


Sunday, August 23, 2020

Invoice Posting -MIRO


Posting Invoice:-If Invoice is received from the vendor after goods receipt,then invoice is verify by ordering party.It is the phase where the vendor is paid from the company reconciliation of the invoice and PO.The invoice can be posted by following steps given below-

Path to Post Invoice

Logistics ⇒ Materials Management ⇒ Logistic Invoice verification ⇒ Document Entry ⇒ Enter Invoice

TCode: MIRO

Step 1:- Execute the MIRO tcode the new screen will be opened.


Step 2:-Fill in all the necessary details such as invoice posting date, amount that is paid to the vendor along with the quantity for which the amount is paid. Click on Save. Invoice is now posted for the goods receipt.


Posting Goods Receipt


Posting Goods Receipt:- After Processing of the purchase order the vendor delivers the material to the ordering party and this process is called Goods Receipt. It is the phase where the material is received the ordering party and its condition and quality are verified. Once the material is verified against the predefined quality, a goods receipt is posted . Goods receipt can be posted by following the steps given below.

Path to Post Goods Receipt

Logistics ⇒ Materials Management ⇒ Inventory management ⇒ Goods movement ⇒ Goods movement

TCode: MIGO

Step 1:- Execute the Tcode MIGO.

SAP goods receipt detail


Step 2:- After filling the above given details such as movement type (101 for goods receipt), name of the material, quantity received, details of storage location and the plant where the material will be placed. Click on Save a document number will be generated for the above process.


Friday, August 21, 2020

How to creating Purchase Order

 SAP Reports 39% Cloud Sales Surge In 2019, Continued Customer Migration To  S/4HANA

Purchase Order:- 

A purchase order is a legally binding document between a supplier and a buyer.It details the items the buyer agrees to purchase at a certain price point . It also outlines the delivery date
and terms of payment for the buyer.The process of buying materials and obtaining services from vendors or dealers is called procurement .The steps required to procure material forms the procurement cycle. Every organization performs some common sequential steps to procure material in the right quantity at the right price. The important steps in a procurement cycle are as follows.

  • 👉Determination of Requirement
  • 👉Creating Purchase Order
  • 👉Posting Goods Receipt
  • 👉Posting Invoice

Determination of Requirement :- Requirements determination is the beginning sub phase of analysis. In this sub phase, analysts should gather information on what the system should do from as many sources as possible. There are some traditional methods to help collecting system requirements, such as interviewing, survey, directly observing users, etc.

Path to Create Purchase Order

Logistics ⇒ Materials Management ⇒ Purchasing ⇒ Purchase Order ⇒ Create ⇒ Vendor/ Supplying Plant Known

TCode: ME21N


Step 1:-Click the execute button after entering the t code.

Manual creation of the source list


Manual creation of Source list :-Source list can be created manually by following the steps given below.

Path to Maintain Source list

Logistics ⇒ Material Management ⇒ Purchasing ⇒ Master Data ⇒ Source List ⇒ Maintain

TCode: ME01

Step 1:- Execute the ME01 Tcode and please see the below screenshot.

SAP Source List manual

Step 2:-Enter the material number for which you want to maintain the source list and respective plant details and click the enter button.

SAP Source List material

SAP Source List entry

Step 3:-Fill in all the necessary details & click saved.Source list for the material is now maintained.

Automatically Source determination creation

 Plus Technologies' SAP Print Video | OM Plus Output Management

Source Determination :- 

The source determination facility helps you to find the most suitable source for a certain requirement from the large volume of data that is available, i.e. it suggests a suitable outline agreement or vendor for ordering purposes.


Source list can be created by the following two ways:-

  • Automatically
  • Manually

  • Automatic Creation of Source List:-

  • Step 1:- Click on the MM02 and execute.

  • SAP Source List
  • Step 2:-In the purchasing view, check the box for source list and saved.The source list is created automatically.


How to Create the Info Record

SAP - TWi

Info Record :-

Serves as a source of information for Purchasing. The purchasing info record (also referred to in abbreviated form as the "info record") contains information on a specific material and a vendor supplying the material. For example, the vendor's current pricing is stored in the info record.The main purpose of purchase info record is to adopt the data from info record to all purchasing documents like Request for Quotation (RFQ), Purchase Order (PO) and outline agreement.

Types of Purchase Info Records:-

Info records can be maintained for different procure types, the different types of purchase info records are

  1. Standard
  2. Pipeline
  3. Consignment
  4. Sub contract

Path to create Info Record:-

Logistics ⇒ Material Management ⇒ Purchasing ⇒ Master Data ⇒ Info Record ⇒ Create

TCode: ME11


Step 1:- Select the Create icon, by following the above path or execute the tcode.

SAP Info Record

Step 2:- After that click on the create and filled the details of the vendor name info category

SAP Info Record vendor name

Step 3:-Fill in the required details.

SAP Info Record detail

Step 4:-Provide the info record note if mandatory that can be called as info record description. and click on saved.


Tuesday, August 18, 2020

How to Create the Vendor Master

 Thinking of moving SAP Business One to the cloud? - Leverage SAP Business  One

Creation of Vendor Master:-

The vendor master database contains information about the vendors that supply an enterprise. This information is stored in individual vendor master records. A vendor master record contains the vendor's name and address, as well as data such as: The currency used for ordering from the vendor.

Path to create Vendor Master

SAP Menu ⇒ Logistics ⇒ Material Management ⇒ Purchasing ⇒ Master Data ⇒ Vendor ⇒ Central ⇒ Create

TCode: XK01 or BP For Hana.

Step 1:- select Create for Central Vendor Data, by following the above path.

SAP Create Vendor

Step 2:-Fill the given below details for examples

SAP Vendor code Address details

Step 3:-Fill the vendor payment transactions.

Vendor reconciliation account - vendor code SAP

Step 4:-Update the required details like payment terms, automatic payment transactions, invoice verification, etc

Create vendor payment transactions SAP - tutorialkart

Step 5:-Enter the payment terms given below tab.

Create vendor code purchasing data SAP


Step 6:-After the filling above details the vendor is created.


Monday, August 17, 2020

Define Number Range for Vendor Master & Assigned

Apple Sap - Topapps4u

Path to create Number Range:-

IMG ⇒ Logistic General ⇒ Business Partner ⇒ Vendors ⇒ Control ⇒ Define Number Range for Vendor master record

TCode: XDN1

Step 1:-select Define Number Range for Vendor Master Record, by following the above path.

SAP Vendor Number range

Step 2:-Click the Intervals button. It will create a number range for the customer account.

SAP Vendor Number range Interval

Step 3:-Click the Insert button.


Step 4:-The external number assignment can be done in that vendor). Click on Save. A new Number Range will be created.After defining a number range, we need to assign it to a vendor group. Follow the steps given below to assign the number range

SAP Vendor Assign Number range

Step 5:-For a particular vendor group, assign a number range here. Click on Save. Number range is now assigned to the vendor group.

SAP Vendor Assign Number range Entry


Create Vendor account Group

Apple and SAP hope to create a new class of iOS developers | CIO

Vendor Account Group:-

Vendor Account Group:-vendor account group is a classifying feature of vendor master records in SAP.Interval from which a unique number is assigned to a vendor. Whether the number is assigned by the user (external number assignment) or by the system (internal number assignment)

Path to create Vendor Account Group

IMG ⇒ Logistic General ⇒ Business Partner ⇒ Vendors ⇒ Control ⇒ Define Account group and field selection(vendor)

TCode: OBD3

Step 1:-select Define Account Groups and Field Selection (Vendor), by following the above path.

SAP MM : How to Create the Vendor Account Group ? | sapGyan.com

Step 2:- Click the New Entries button.

SAP Vendor Account entry

Step 3:-Fill in all necessary details such as name of account group, general data, and field status. Click the Save button. A new Vendor Account Group will be created.

 SAP Vendor entry details


How to extend the material storage location in the mass

                      Path Extend the storage location in Mass in the SAP:-           Step 1:- Use Transaction code= MMSC_MASS  and execute....